Table of Contents
Setup Guide
For the initial setup, it's important to prepare a hard drive that can be used as system drive. This should be a blank drive, because all existing data gets erased during the formatting process. In this guide, step 1 and 3 only have to be done once during the initial setup.
Step 1 - HDD Installation
For the system drive, we recommend using an internal hard drive. This should be a blank drive, because all existing data gets erased during the formatting process. Depending on the hardware, you can install either portable 2.5“ hard drives or 3.5” desktop drives.
For more detailed instructions about how to install the hard drive, please select your model below:
Step 2 - Login
Since the MyAkitio web portal has been discontinued on August 31, 2019, it's now only possible to access the login page by entering the local IP address of your device directly into the URL field of the web browser.
- Open your web browser (e.g. IE, Firefox, Safari, Chrome).
- Enter the local IP address of your device directly into the URL field of your web browser.
- Login to your account. The default user name and password for the administrator is admin. For security reasons, we strongly recommend changing the password after the first login.
Step 3 - HDD Setup
Before you can properly use the device, a drive has to be setup as system drive. This includes creating a SWAP partition and a partition to store your digital media files that is mounted as HOME.
- If you have not already done so, login as administrator (admin).
- In the toolbar, click on the disk manager.
- Select Auto and click OK. This will automatically create the necessary partitions and format the drive(s).
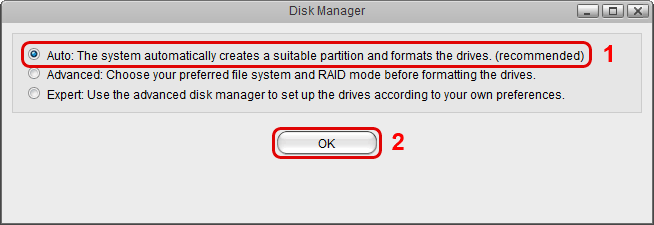
- Click Auto to setup and format the drive(s).

Step 4 - Uploading Files
Once the system drive has been setup, you can start uploading your digital media files to the network drive. The HOME directory with its predefined folders for documents, music, photos and videos is for your private files. The PUBLIC directory is for files that are shared among the users that have access to this device (by default, this is only the administrator).
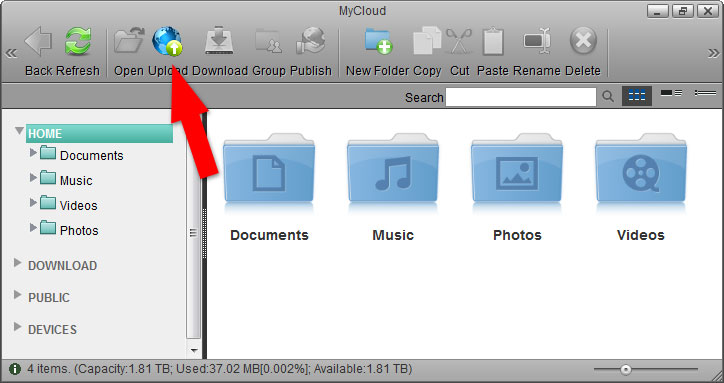
- On the desktop, click on MyCloud to open the file explorer window.
- Depending on the files types you want to upload, select one of the predefined folders (e.g. Documents, Music, Photos, Videos).
- In the menu bar, click Upload.
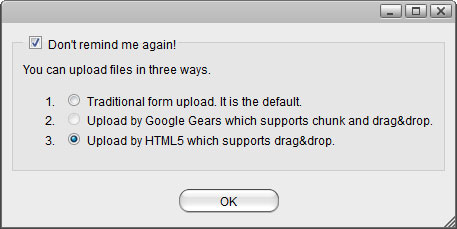
- Select one of the available upload methods. If in doubt, select the traditional form upload. This will work on most browsers but you will have to upload the files one at the time. Instead, if you are running one of the more recent browsers, select Upload by HTML5, which allows you to drag and drop multiple files directly into the upload window.
- Upload your media files.
Step 5 - Streaming Files
Once you have uploaded your digital media files, you can setup the media server and the music server to stream your music and videos on the home network.
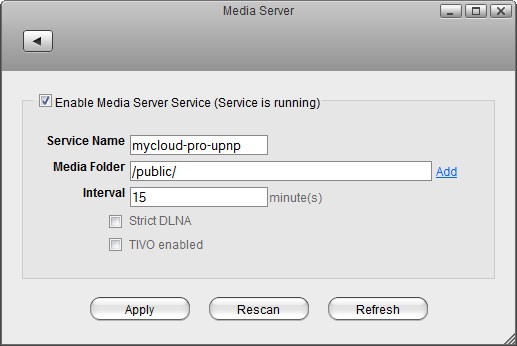
UPnP-AV Media Server
The media server streams your files to other UPnP-AV and DLNA compliant clients (e.g. PS3, Xbox360, Windows Media Player, etc.). To find DLNA compliant media devices that can play your media files on the network drive, look for the “DLNA Certified” logo or use the Product Search on the official DLNA website.
- In the toolbar, click on Preferences.
- Select Media Server.
- Make sure the service is enabled and running.
- Click Add to select the folder(s) where your media files are stored. If needed, you can add multiple folders. The media server will scan for all the compatible media files in those directories and then stream them to the other UPnP-AV compliant devices on your home network.
- Click Apply to save the settings.
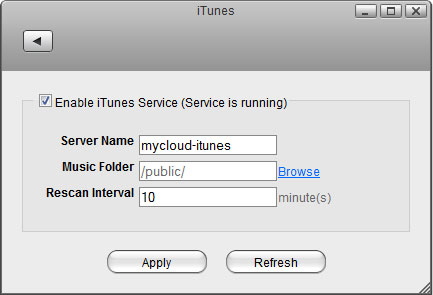
iTunes Music Server
The iTunes music server streams music files that are located on the network drive to iTunes users on the home network. Simply install iTunes on your PC or Mac and use it to playback the music files on your network drive.
- In the toolbar, click on Preferences.
- Select iTunes.
- Make sure the service is enabled and running.
- Click Browse to select the folder where your music files are stored.
- Click Apply to save the settings.
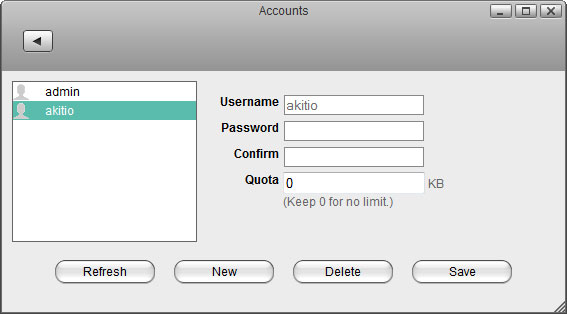
Step 6 - Sharing Files
There are several ways you can share files with your family and friends but before you start, it's easiest to give them a user account on the network drive.
- In the toolbar, click on Preferences.
- Select Accounts.
- Click New.
- Enter a username.
- Enter a password and confirm it.
- Click Save to create the new account.
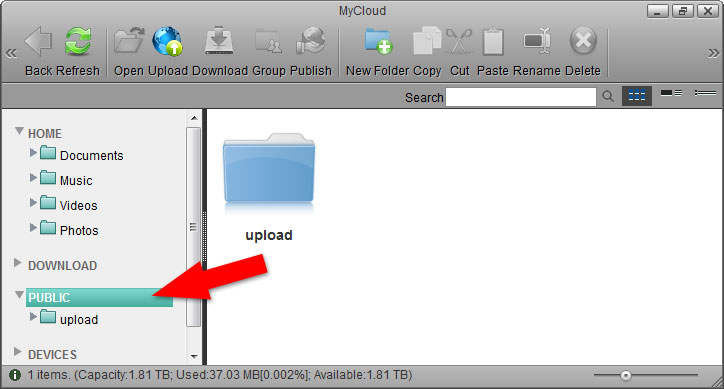
Public Directory
Files that are stored in the PUBLIC directory are accessible to all users (read & write). Simply copy a file to the PUBLIC folder and the next time another user logs in, they can view it. It doesn't matter if the user logs in via web interface or mounts the network drive on the home network.
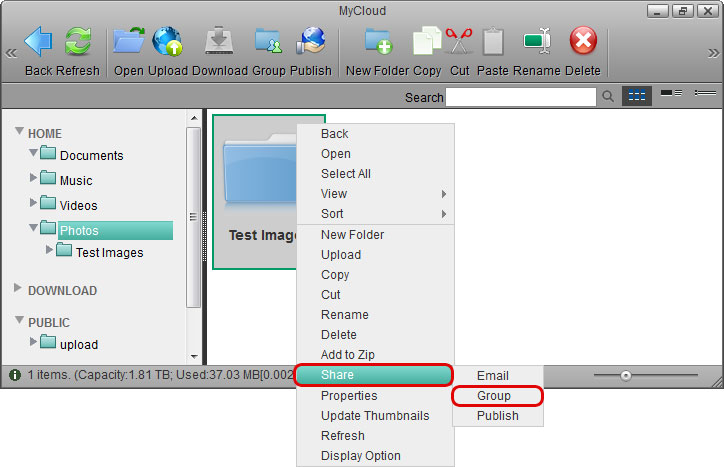
Sharing a Folder
If you want to share files with other users but restrict access, as an example only to certain users or give them only read access, you can use the context menu in the web interface.
- On the desktop, click on MyCloud to open the file explorer window.
- Right-click on the folder you want to share to open the context menu.
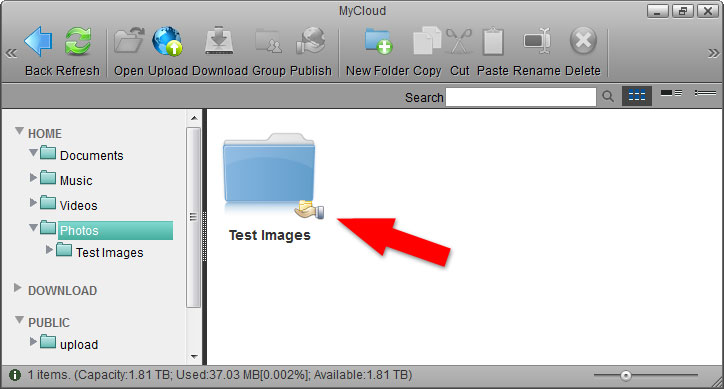
- Select Share and click Group.
- Enable the option Share this folder and select the users you want to share the folder with.
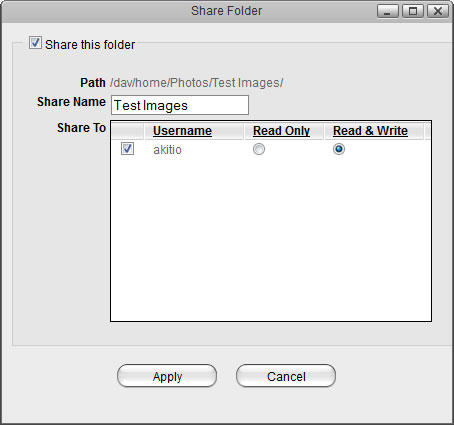
- Click Apply to save the settings.
- Click Refresh and the folder icon shows a hand to indicate that this folder is currently shared.