This is an old revision of the document!
Table of Contents
Samba on a Mac
Samba is the recommended method to upload and manage a large amount of files, including directories and sub-folders or very large files. Once the network drive is mounted, you can manage the files just like you would do with any other drive on the computer.
To change the host name of your network drive, go to Preferences > Network.
You can only use Samba when both your network drive and the computer are connected to the same local network. If you are not at home and would like to access your files remotely, this method does not work. As an alternative, you could mount the drive using WebDAV, although the transfer rates will be slower and there are some other limitations as well. Instead, you might want to consider using FTP or if you don't have to upload a large amount of files, simply use the web interface.
Setup Samba Service
- Login to your network drive as administrator.
- Go to Preferences > Samba.
- Make sure the Samba service is up and running.
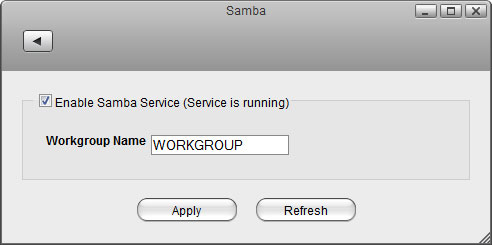
- For the workgroup name, make sure the network drive belongs to the same workgroup as your computer. In most cases, you can set this to WORKGROUP.
Connect to Server
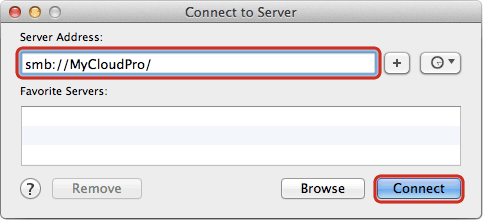
- From the Go menu in the menu bar choose Connect to Server or use the keyboard shortcut Command+K.
- Type smb:// followed by the local IP address (e.g. 192.168.1.10) or the hostname of your network drive and click Connect.
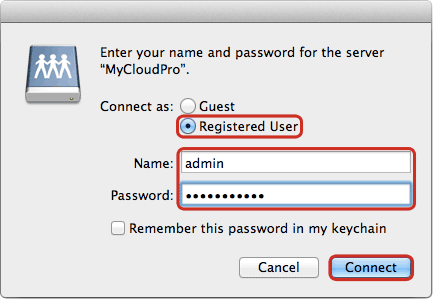
- Select Registered User, enter the login credentials of your user account on the network drive (e.g. admin/admin) and click Connect.
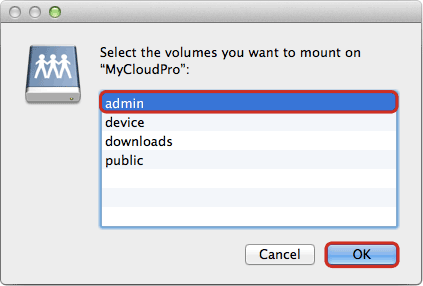
- Choose a folder from the list and click OK.
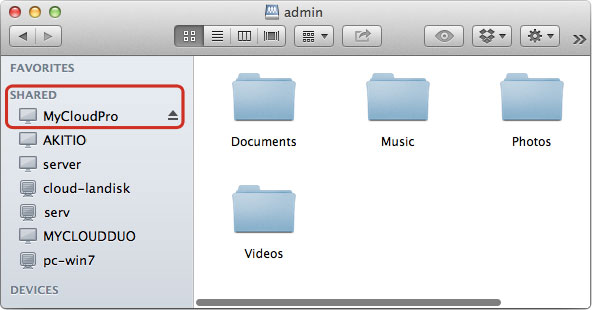
- The network drive is now listed in your finder under Shared devices. When no longer needed, click on the eject button to disconnect the drive.
