This is an old revision of the document!
Table of Contents
Toolbar
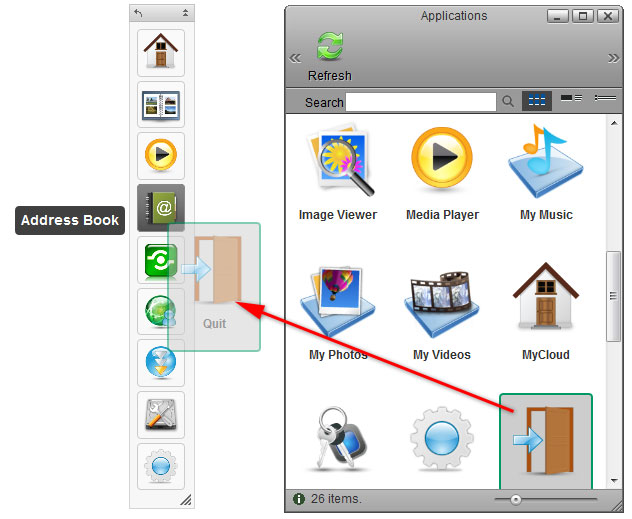
The toolbar gives you quick access to your applications and settings. You can delete unwanted shortcuts and add new ones by dragging a new application from the Application folder to the toolbar.
Whereas the shortcuts on your desktop are hidden behind other windows, the toolbar stays on top, so you always have access to it. You can adjust the size, flip the orientation, move it to another position and also completely hide it, depending on what is most convenient for you.

Customize Toolbar
Add New Application
- Open the Applications folder.
- Drag an application on top of an existing application in the toolbar.
- Re-arrange the position by dragging the icon to the new location.

Delete Unwanted Application
- Right-click on the application you want to delete to open the context menu.
- Select Delete.
Restore Toolbar
- Right-click on any of the applications to open the context menu.
- Select Restore Toolbar and it will set the applications back to factory default.
Change Icon
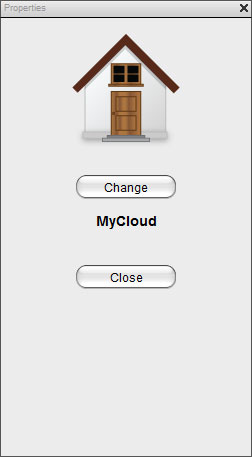
- Right-click on the application and select Change Icon from the context menu.
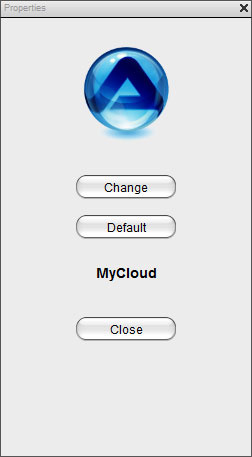
- Click Change and select your custom image.
- To revert back to the original shortcut icon, click Default, otherwise click Close to close the window.


Re-Arrange Toolbar
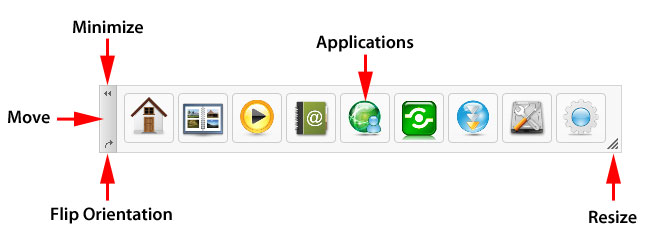
In addition of adding and removing applications, you can also change the location and size of the toolbar.
- Click and drag on the gray handle to reposition the toolbar.
- Click on the double arrows in the gray handle to minimize the toolbar.
- Click on the single arrow in the gray handle to flip the orientation from vertical to horizontal or vise verse.
- Click and drag the triangle in the corner of the toolbar to resize it.
- Right-click on any of the applications and select Hide Toolbar from the context menu to hide the toolbar completely. To show it again, go to the system menu in the top left corner of the screen and select Show/Hide Toolbar.
