This is an old revision of the document!
Table of Contents
Disk Manager
The disk manager helps you manage the disks and partitions your network drive. Before you can properly use the device, one drive has to be setup as system drive. This includes creating a SWAP partition for the system and creating a partition for the data, which is mounted as HOME.
| Function | Description |
|---|---|
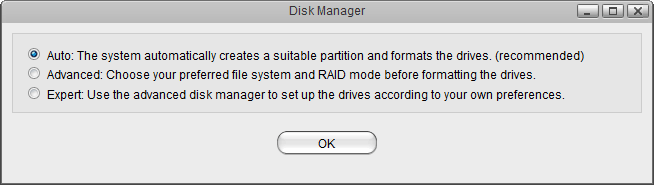
| Auto | The system automatically creates the required partitions and formats the drive(s). When two drives are installed, it creates a RAID 1 array. This is the recommended method to setup your drives. |
| Advanced | The system automatically creates the required partitions but you can first choose your preferred RAID mode and the file system. |
| Expert | The expert mode allows you to manage the disks manually and setup the drives according to your own preferences. |
Auto
The auto mode is the recommended method to setup your system drive. The process is fully automated and no further user input is required.
- Click Auto to automatically setup and format the internal drive(s).

- The installation wizard will deactivate all disks and if two drives are installed, it will create RAID 1 array. It will create a SWAP partition for the system, a partition for your data, format the drive(s) using the XFS file system and then mount the partitions.
- When the process is completed, your system is ready for use.
Advanced
The advanced mode is still half automated but requires further user input, allowing you to choose your preferred RAID mode and the file system. If you would like to create a RAID 0 array for your system drive or format an external USB drive, use this mode.
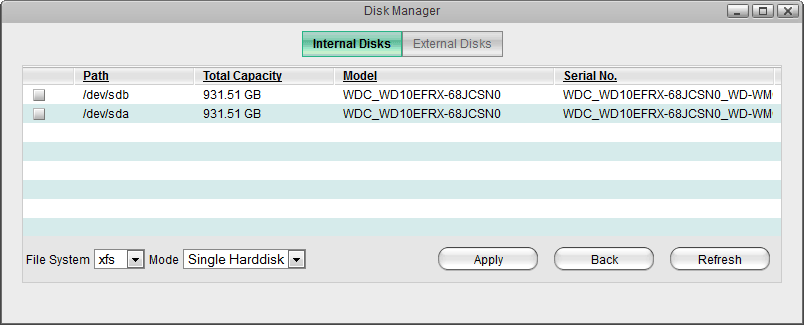
Internal Disks
The hard drives listed under internal disks are either drives that are installed inside the network enclosure or drives that are attached to the eSATA port of the network drive.
| Function | Description |
|---|---|
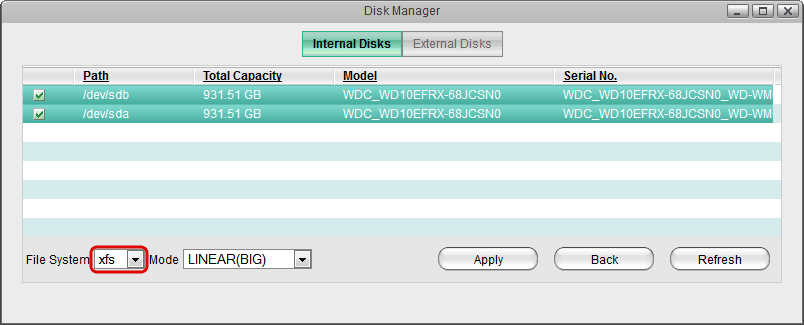
| File System | For internal drives, you can choose between the XFS and EXT4 file system. The default and recommended file system is XFS. |
| Mode | When only one drive is selected, the mode is automatically set to Single Harddisk. When multiple drives are selected, you can choose you preferred RAID mode from the drop-down menu (e.g. LINEAR Big, RAID 0 Striping, RAID 1 Mirroring). |
Setup a RAID Array
- Make sure you have two disks available in your list for internal disks.
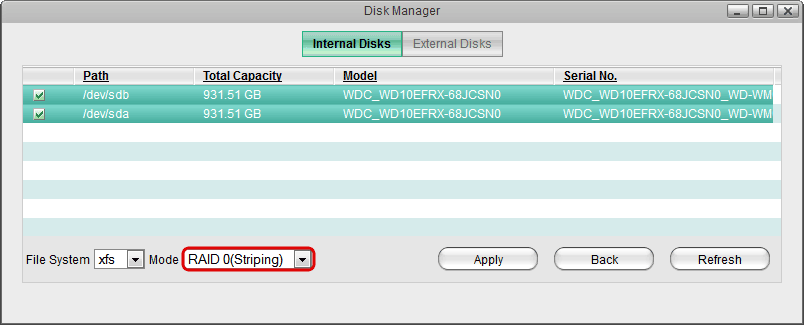
- Place a tick in the box for both drives or control (Ctrl) click on both drives to select them.
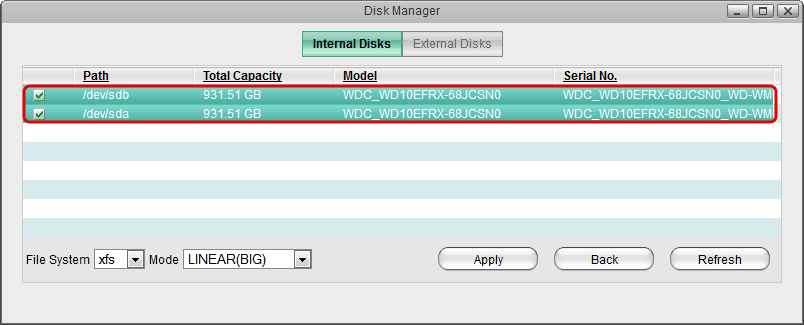
- Select your preferred file system (e.g. xfs).
- Select your preferred RAID mode (e.g. RAID 0).
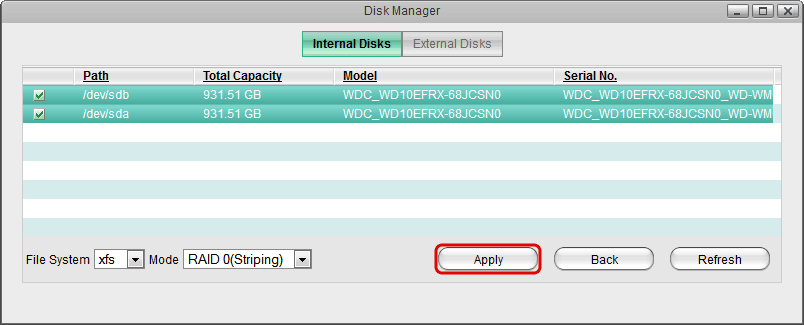
- Click Apply to create the required partitions for your system drive and format it.
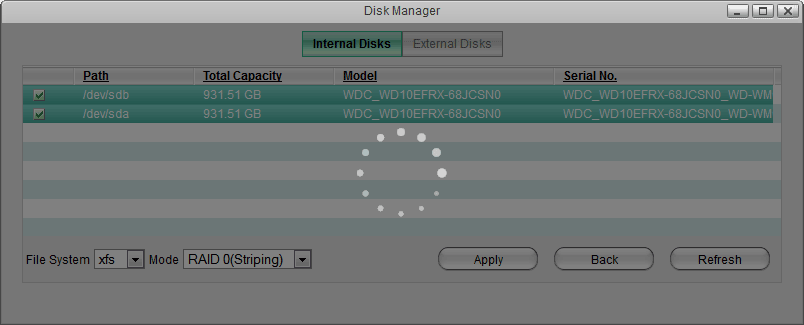
- Wait for the formatting process to complete. Depending on the capacity of your drives, this might take a minute or two.
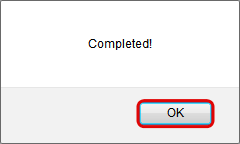
- When the formatting process is completed, click OK to close the confirmation window.
External Disks
The hard drives listed under external disks are USB drives that are attached to the USB port of the network drive. If the drive is already formatted, it will be mounted automatically. If needed, you can use the disk manager and format the drive by choosing a file system from the drop-down menu (e.g. FAT32, NTFS, HFS+, EXT4, XFS) and by clicking on Apply.

Expert
The expert mode allows you to manage the disks manually and setup the drives according to your own preferences. This mode should only be used by advanced users. If the drives are not setup correctly, it can affect both the functionality and the stability of the system.
| Button | Function | Description |
|---|---|---|
 | Info | View more detailed information about the selected disk or partition. |
 | Erase Device | Delete all partitions on the selected disk. |
 | SMART Info | View the S.M.A.R.T. information of the selected disk. Please note that not all types of hard disks provide this kind of information. |
 | Mount Partition | Open the “Partition” tab to access further commands to mount the selected partition. |
 | Unmount Partition | Unmount the selected partition. |
 | Delete Partition | Delete the selected partition. |
 | Format Partition | Open the “Partition” tab to access further commands to format the selected partition. |
 | Refresh | Refresh the content. |
 | Back | Go back to the disk manager selection screen. |
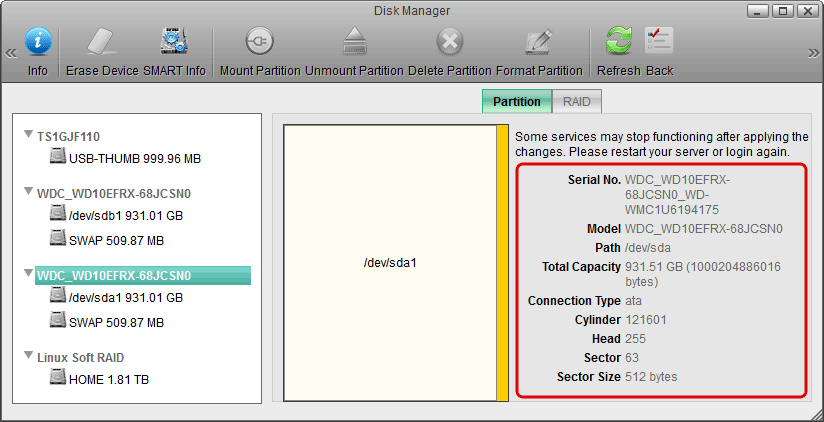
Disk Information
To see more detailed information about a particular disk, select a disk from the list and click Info or select the Partition tab to view the details.
| Field | Description |
|---|---|
| Serial No. | Shows the serial number. |
| Model | Shows the model number. |
| Path | Shows the internal path to the disk in the system. |
| Total Capacity | Shows the total storage capacity. |
| Connection Type | Shows the type of connection. |
| Cylinder | Shows the number of magnetic tracks. |
| Head | Shows the number of magnetic heads as well as plates. |
| Sector | Shows the number of sectors contained in one track. |
| Sector Size | Shows the number of bytes contained in one sector. |
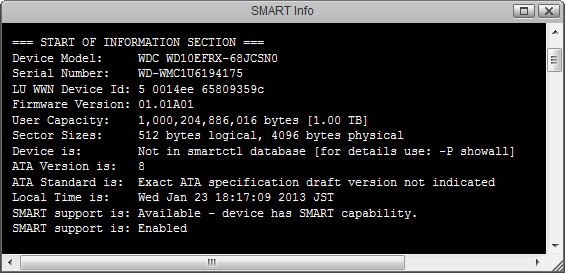
SMART Information
S.M.A.R.T. (Self-Monitoring, Analysis, and Reporting Technology; also written as SMART) is a monitoring system for computer hard disks to detect and report on various indicators of reliability. If the disk supports SMART, select the disk from the list and click SMART Info to view the details.
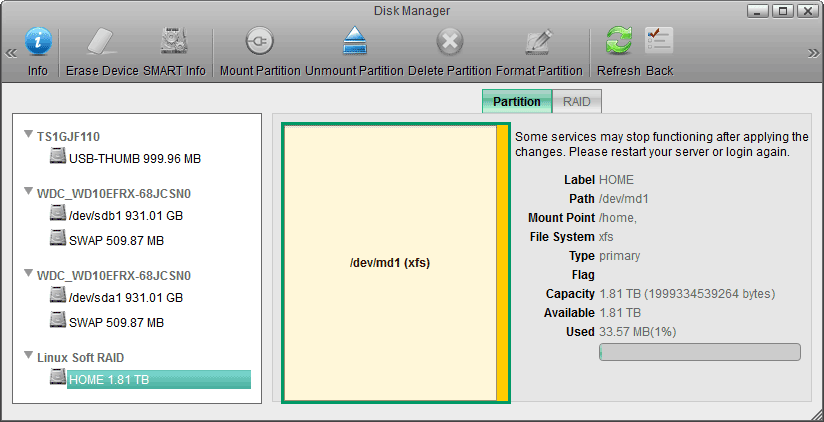
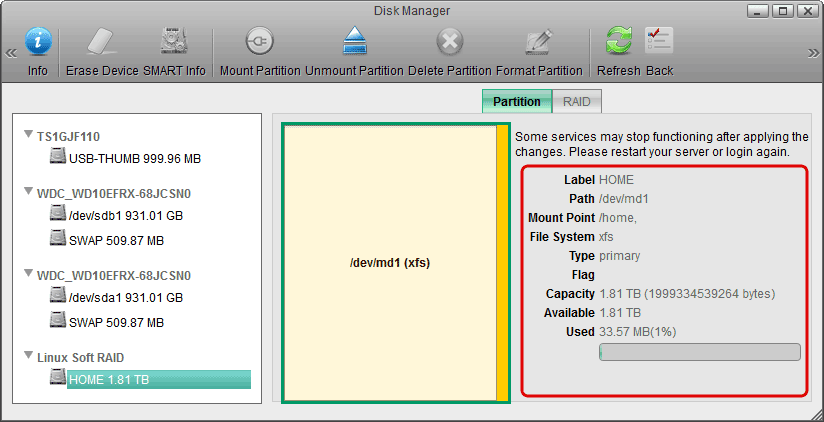
Partition Information
To see more detailed information about a particular partition, select a partition from the list (not a disk) and then select the Partition tab to view the details.
| Field | Description |
|---|---|
| Label | Shows the label of the volume. |
| Path | Shows the internal path to the partition in the system. |
| Mount Point | Shows the path where the volume is mounted. |
| File System | Shows the file system of the volume. |
| Type | Shows the partition type (primary, extended or logic) of the partition. |
| Flag | Shows the flag of the partition. |
| Capacity | Shows the total storage capacity of the partition. |
| Available | Shows the remaining available storage capacity of the partition. |
| Used | Shows the already used storage capacity of the partition. |
Manage the Disks
Erase a Disk
- Select the disk that you would like to erase from the list.
- Click Erase Device.
- Confirm that you really want to erase this disk.
Create a Partition
- Open the Partition tab.
- Select the free space (not the disk) from the list or select the free space in the area that shows the partition map.
- Select a partition type from the drop-down menu (e.g. primary, extended or logic).
- Enter a size for the new partition or use the default value to create the largest possible partition.
- Click Create.
Delete a Partition
- Select the partition that you would like to delete from the list.
- Click Delete Partition.
- Confirm that you really want to delete this partition.
Format a Partition
- Select the partition that you would like to format from the list.
- Click Format Partition to open the Partition tab for further commands.
- Enter a label (name) for this partition.
- Choose a file system from the drop-down list (e.g. EXT2, EXT3, EXT4, XFS, ReiserFS, FAT32, NTFS, HFS, SWAP).
- Click Format to format the partition.
- Wait for the formatting process to complete.
Mount a Partition
- Select the partition that you would like to mount from the list.
- Click Mount Partition to open the Partition tab for further commands.
- Enter a mount point or if you would like to use this partition as your system storage, check Mount as HOME.
- Click Mount.
Unmount a Partition
- Select the partition (not the disk) that you would like to unmount from the list.
- Click Unmount Partition.
Setup a RAID Array
You can create a disk RAID if you have more than one internal disk. You can also create a RAID using one or more partitions, but we do NOT recommend to do this. Disk RAID arrays are listed with the name Linux Soft RAID.
| Type | Description |
|---|---|
| BIG | Concatenate the partitions to make a single virtual disk with larger volume |
| RAID 0 | Block-level striping without parity or mirroring. |
| RAID 1 | Mirroring without parity or striping. |
- Open the RAID tab.
- Drag the partitions or disks from the list to the RAID table. To remove an item from the RAID list, click the red cross in front of the item.
- Select your preferred RAID mode from the drop-down list.
- Click Create to build up the RAID array.
Destroy a RAID Array
- Select the RAID array that you would like to delete.
- Open the RAID tab.
- Scroll down and click Destroy.
- Confirm that you really want to destroy the RAID array.
Formatting USB Drives
Whereas for the internal system drive, the file system has to be XFS, for additional storage on an external USB drive, most of the common file systems are supported. However, depending on how the drive has been formatted, there are some limitations. In general, it's best to format the drive on your computer.
USB drive has been formatted with the disk manager
| File System | Connected to the NAS | Connected to the Computer |
|---|---|---|
| FAT32 | Read & Write | Read & Write |
| NTFS | Read & Write | Cannot mount the drive |
| HFS | Read & Write | Have to repair disk first before it can be used |
| EXT2 | Read Only | N/A |
| EXT3 | Read & Write | N/A |
| EXT4 | Read & Write | N/A |
| XFS | Read & Write | N/A |
USB drive has been formatted on a computer
| File System | Connected to the NAS | Connected to the Computer |
|---|---|---|
| FAT32 | Read & Write | Read & Write |
| NTFS | Read & Write | Make sure to follow the safe removal procedure when ejecting the drive on the computer. Otherwise, new files will not be recognized on the NAS and will be lost once the drive is re-attached to the computer. |
| HFS | Read Only | Read & Write |
