Table of Contents
iBackup Overview
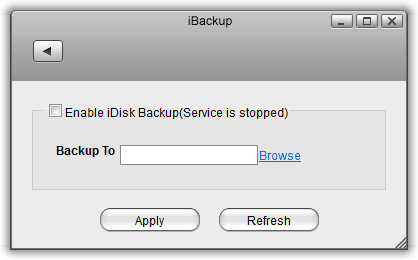
The iBackup service can be used to backup all your photos and videos from the iPhone or iPad on your network drive. Enable the iBackup service and connect the mobile device via USB to your network drive to run the backup.

| Button/Label | Function |
|---|---|
| Enable iDisk Backup | Select to enable or deselect to disable the iBackup service. |
| Backup To | Displays the path to the destination folder for the backup. |
| Browse | Click to select a new destination folder for the backup. |
| Apply | Save and apply the new settings. |
| Refresh | Refresh the screen to load the latest settings. |
How to enable the iBackup service on your network drive
- Open the web browser and login to your network drive.<
- Go to “Preferences” and select “iBackup”.<
- Place a tick in the box “Enable iDisk Backup”.<
- Click Browse and select a destination folder for your backup files.<
- Click Apply to save the settings and enable the iBackup service.<

How to backup your files from the mobile device
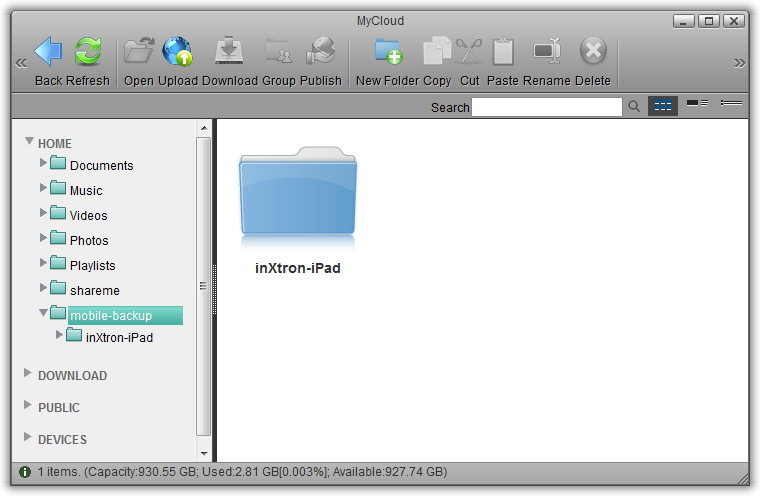
Once the iBackup service is enabled (see instructions above), simply connect your mobile device (e.g. iPhone or iPad) via USB to your network drive and the backup starts automatically. All images and videos are copied to the destination folder that is defined in the preferences.
To access your backup files, login via web browser or mount the network drive. You can find the files in the pre-set destination folder under your device name.

